This is a story of how I fixed my one-year-old Apple Smart Keyboard with inexpensive Copper tape. There are multiple YouTube videos(linked below) that describe the procedure with the use of soldering wires on the connector pins. But, I was able to fix without any soldering and would like to share the steps in this post.
Problem
I bought an Apple iPad Air 3 with Apple Smart Keyboard in November 2019. Exactly after one year of use, around mid of November 2019, the keyboard stopped getting recognized by the iPad randomly. Initially, a little adjustment on the Smart Connector pins made it work. But it stopped working entirely soon after. Internet search told me it is a common problem, and the most common fix is cleaning connector pins with an alcohol-based solution. I tried the same, but it didn’t help.
I took the keyboard to Apple authorized service centre, which is run by the same company from where I bought the iPad Air and Smart Keyboard originally. They first confirmed the problem is on the keyboard by connecting the keyboard to different iPad and connecting a different keyboard to my iPad.
After confirming the problem is on the keyboard, they checked the warranty and realized it has expired one month back. Apparently, Apple has a replacement program for Smart Keyboard(they didn’t say it was a manufacturing defect, but I wonder why else they have replacement program). But, they were not sure whether my keyboard is covered under the program. They asked me to hand over the keyboard and said they would call me once they hear back from Apple. I got a call in two days, and I was told Apple can’t provide a replacement. I insisted on providing a replacement or at least repair it as it is just one month past from the warranty period. They said they can neither provide replacement nor repair as these keyboards non-serviceable. The only option they offered me was buying a new Apple Smart Keyboard, which would cost around Rs.14,000.
I did some research on the Internet and found out that many people had faced the same issue with Apple Smart Keyboard. I also found YouTube videos 1, 2 explaining how we can fix it with copper tapes or soldering.
Cause
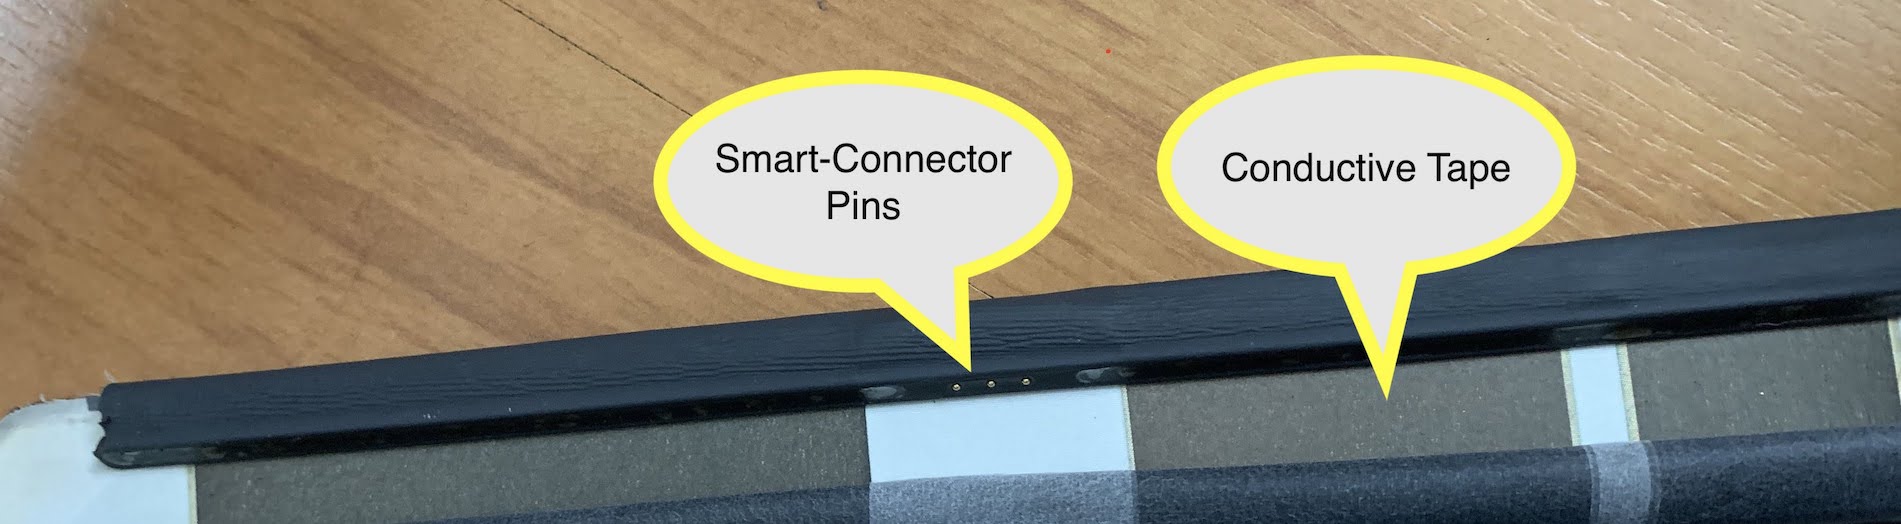
Apple Smart Keyboard uses conductive tapes to connect the Smart Connectors with keyboard electronics. Allegedly, there are two common issues with this connection. Either the connection between Smart Connectors and conductive tape is worn out(as it happened in my case) or the conductive tape itself is worn out(as shown in the YouTube video). In both cases, the keyboard wouldn’t get recognized by the iPad.
Fix
The fix is as simple as reestablishing the connection between Smart Connector and conductive tape or between the disconnected areas of the conductive tape.
The YouTube videos tried best to hide the patchwork within the outer layer of the keyboard. The videos soldered a thin wire between the Smart Connector and the conductive tape to hide the patchwork. Despite having a soldering kit and having done soldering multiple times, I am not good at soldering tiny components. I was concerned about damaging the Smart Connector pins or the keyboard shell. At the same time, I wasn’t too concerned about aesthetics. So, I decided to avoid soldering and keep all the patchwork on the outer layer of the keyboard itself.
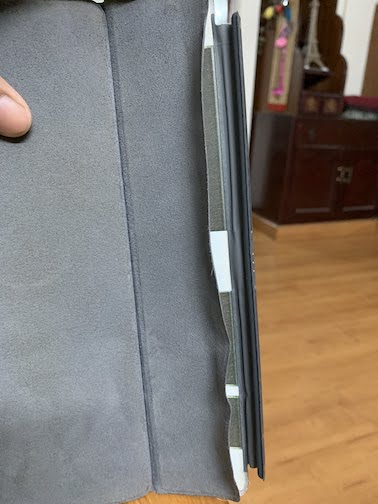
Step 1 - Peeling off the outer layer
This was easier than I anticipated. I don’t know whether it was because of the one year use or use of weak glue in manufacturing, the outer layer of the keyboard came off neatly without much of struggle. The trick is finding the starting point where the outer layer is already detached from the inner frame.
Step 2 - Identifying disconnection
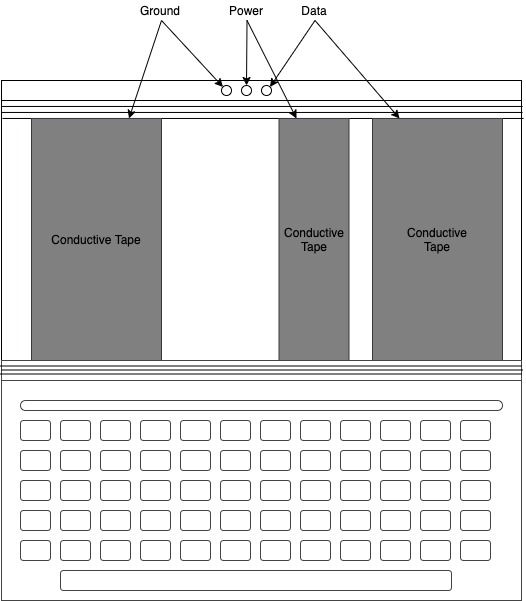
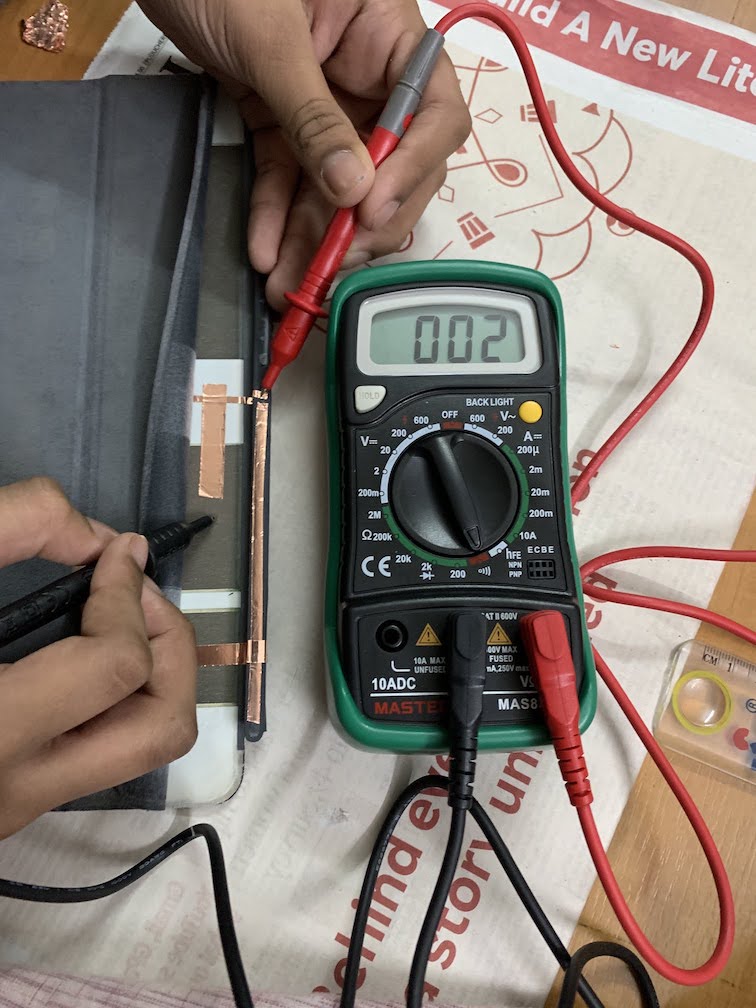
Once the outer layer is peeled off, the conductive tapes are readily visible and accessible. Use a multimeter or continuity tester to check the connection between each Smart Connector pins and the conductive tapes. There should be one or more disconnections. If you don’t find a disconnection, then you might have a different problem from me and these steps wont work.
In my case, the Power and Data connections(pin 2 & 3 from left) were disconnected. The conductive tape itself looked fine as I tried checking the continuity between different points within the tape.
Step 3 - Reestablishing connections
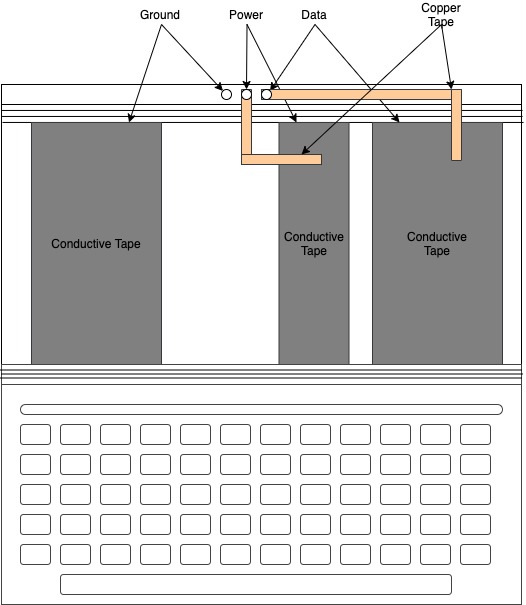
This was the challenging part for me due to my larger fingers. The Smart Connector pins are tiny, and the gap between them is small. I have to lay the copper tape from the pins to the respective conductive tapes without short-circuiting. I had to redo it a couple times before doing it right.
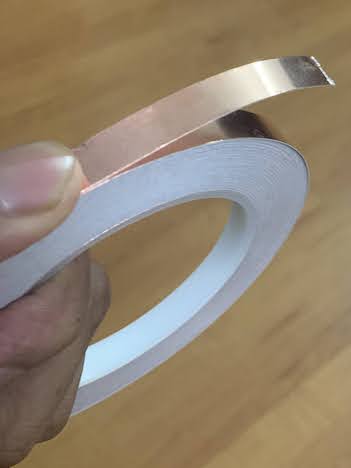
Beforehand, I bought a Copper Tape roll from Amazon. I started laying the tape on top of the Smart Connector pin and laid it all the way to the conductive tape on the keyboard.
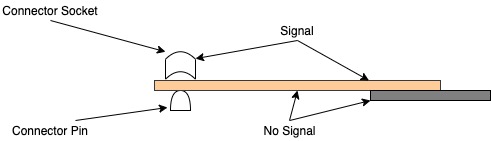
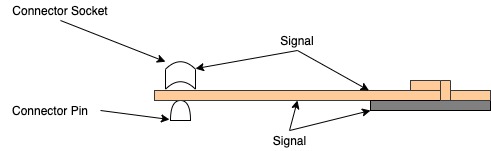
Note 1: The two sides of the copper tape are not interconnected or at least in the one I purchased. So, if the copper tape touches the Smart Connector on the top side, but the conductive tape is connected on the bottom side of the copper tape, then there won’t be any connection between the Smart Connector and conductive tape. The trick is to lay another layer of copper tape connecting the top side of copper tape and conductive tape.
Note 2: While laying the copper tape, I was worried the iPad body may short-circuit the copper tape connections. Fortunately, the iPad body doesn’t conduct electricity(confirmed with a multimeter) despite the body made from an aluminium frame. Maybe, it is coated with a non-conductive material, lucky for me.
Once the connections are reestablished with copper tape, I confirmed the connections between Smart Connector pins and the respective conductive tapes using a multimeter. The connections are good.
Hoping the connection should have the fixed the issue, I connected the iPad to the keyboard and positioned the iPad in docking position. Then I opened an editable widget and voila, it worked! The on-screen keyboard didn’t appear, and key presses on the Smart Keyboard was recognized. I was cheering with my sons(who were watching and helping me in this whole process) that “We fixed it!”.
Step 4 - Wrapping it up
Now it is time to put things back into place and wrap it up. I didn’t peel off the outer layer entirely as shown in the YouTube videos. So, it was relatively easy for me to put it back into its place. I used a Double-Sided tape to stick the outer layer with the keyboard frame. The double-sided tape is similar to cellophane tape except that it has glue on both sides.
End
I hope this post is informative and useful for you. Please let me know if the post helped you in fixing your Smart Keyboard.